
This guide shows you how to set up a One-Shot, collect recipients and book the mailing.
A One-Shot is one print mailing that you send once. You collect the recipients from the API, from your marketing integration or from CSV files, also mixed in the same One-Shot. When all recipients are in, you check the addresses and book.
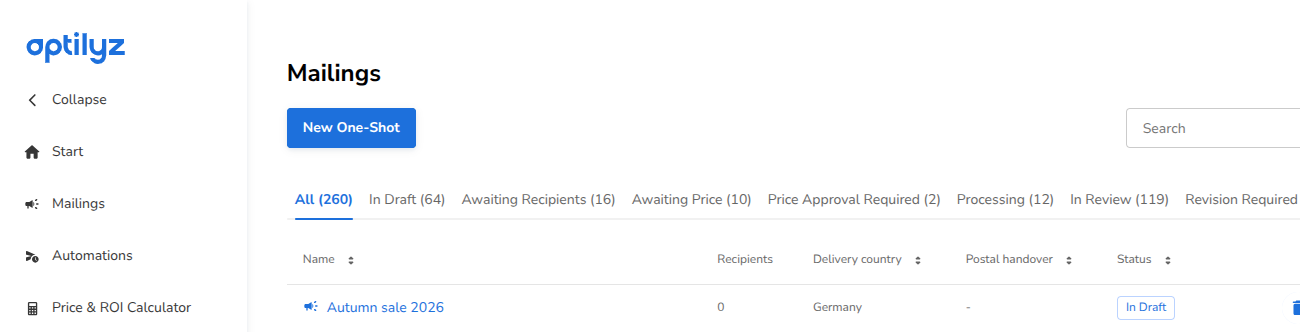
You start a One-Shot with the New One-Shot button on the Mailings page.
Before you start
- Your designs as PDF files: one file for each material and each variation. For a personalised material, you also need a personalised example for each variation.
- A source for your recipient data:
- CSV files in UTF-8 with the optilyz column names, or
- access to the optilyz API, or
- a connection to Emarsys or Salesforce Marketing Cloud.
- Optional: the control addresses that must get a copy of the mailing.
- Optional: to try a One-Shot with test data, download the Demo Kit. It has two CSV files, one for each variation, and design PDFs and personalised examples for a DIN Lang postcard. The file README-en.md in the zip tells you how to use it.
How a One-Shot works
A One-Shot has two parts:
- Part A: Set up your One-Shot. You go through the setup steps: name, country, validation rules, materials, visuals and control addresses. This part ends with Start collecting recipients.
- Part B: Collect recipients and book. On the One-Shot page, you add recipients, validate them, choose the postal handover date and book.
In a One-Shot, you do not upload a file during the setup. You add and validate recipients on the One-Shot page, after the setup. There is no encoding step and no column-mapping step: CSV files must be in UTF-8 and use the optilyz column names.
Part A: Set up your One-Shot
Step 1: Start a new One-Shot
- Open the Mailings page.
- Click New One-Shot.
The One-Shot shows in the list with the status In Draft until you finish the setup. You can delete a One-Shot from the list only while it is in draft.
Step 2: Enter a name and choose the delivery country
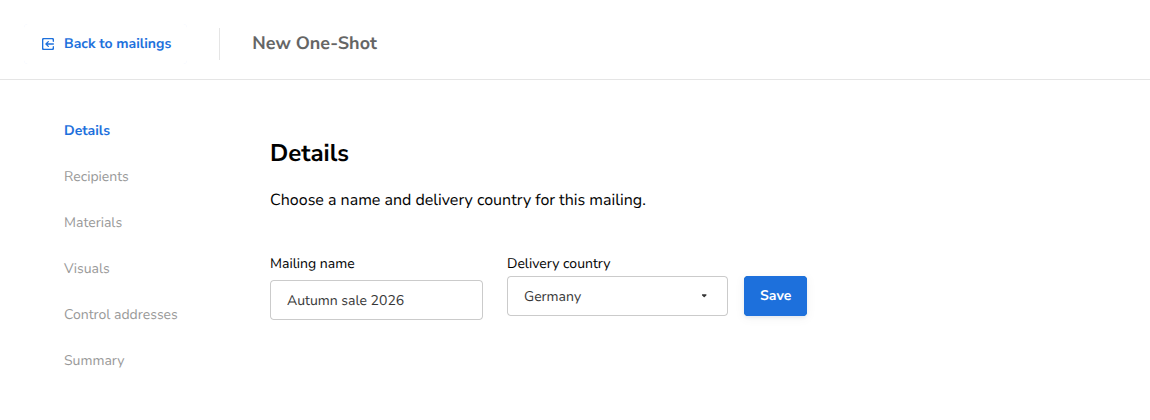
- Type a Mailing name. The name is required and must have at least 3 characters. We do not fill in a name for you.
- Choose the Delivery country.
- Click Save.
The Save button shows only after you choose a country. You cannot change the delivery country later. For France and the Netherlands, a notice with the mailing regulations for that country shows under the form.
Step 3: Check the details
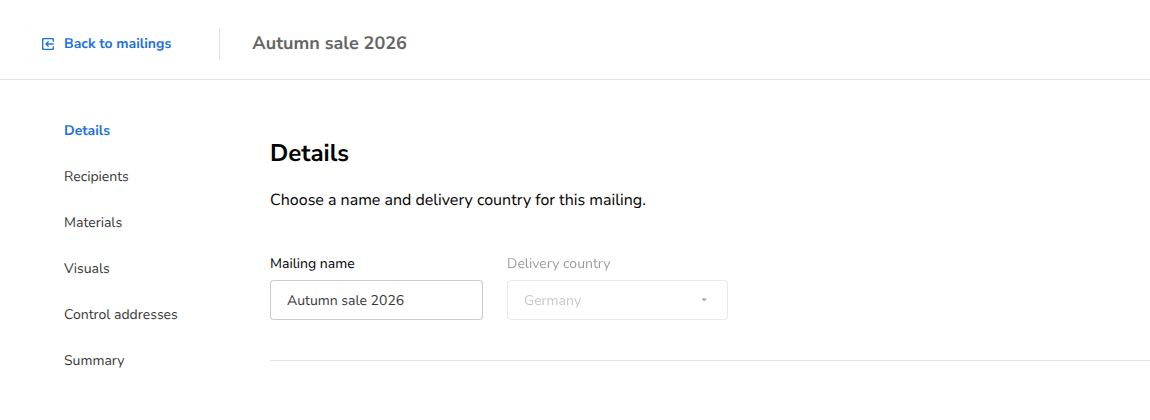
The Details step shows the name and the delivery country. The country is locked.
To change the name, type the new name and click Save. The Save button shows only after you change the name. If you click Next without Save, the new name is not kept.
Step 4: Set the recipient validation rules
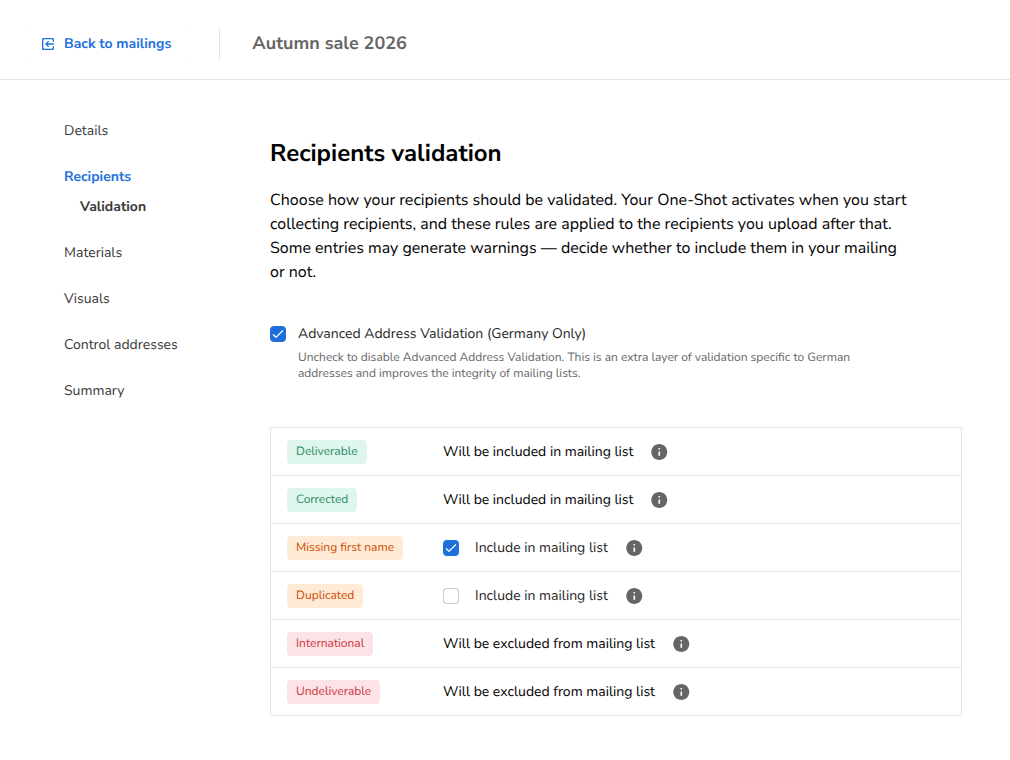
On Recipients validation, you set the rules for the recipient validation. There are no recipients yet. The rules apply to the recipients that you add later. Each change is saved at once.
Advanced Address Validation (Germany Only): extra checks for German addresses. It is on by default. You see this option only if your delivery country supports it. With this option, we:
- write each street name in one standard form, for example "Hauptstraße" becomes "Hauptstr.", and move a house number out of the street field. These addresses show as Corrected,
- check that the zip code has 5 digits,
- check that the address is in your delivery country, if your recipient data has a country,
- exclude Packstation, Postfiliale and "postlagernd" addresses.
We do not check that an address exists. We do not find or correct a wrong street, a wrong city or a wrong zip code that has 5 digits. Without this option, we check only that each address has a last name, a street, a zip code and a city.
Deliverable and Corrected: these addresses are always included.
Missing first name: included by default. To exclude these addresses, clear Include in mailing list.
Duplicated: excluded by default. To include duplicates, select Include in mailing list. If you exclude duplicates, we delete them during the validation, so nobody gets your mailing twice.
International and Undeliverable: these addresses are always excluded. International addresses are not in your delivery country. Undeliverable addresses have no last name or a last name with only one letter, have no street, zip code or city, or have a zip code in the wrong format. Packstation, Postfiliale and "postlagernd" addresses are also undeliverable. P.O. box (Postfach) addresses are not excluded.
Step 5: Select your materials
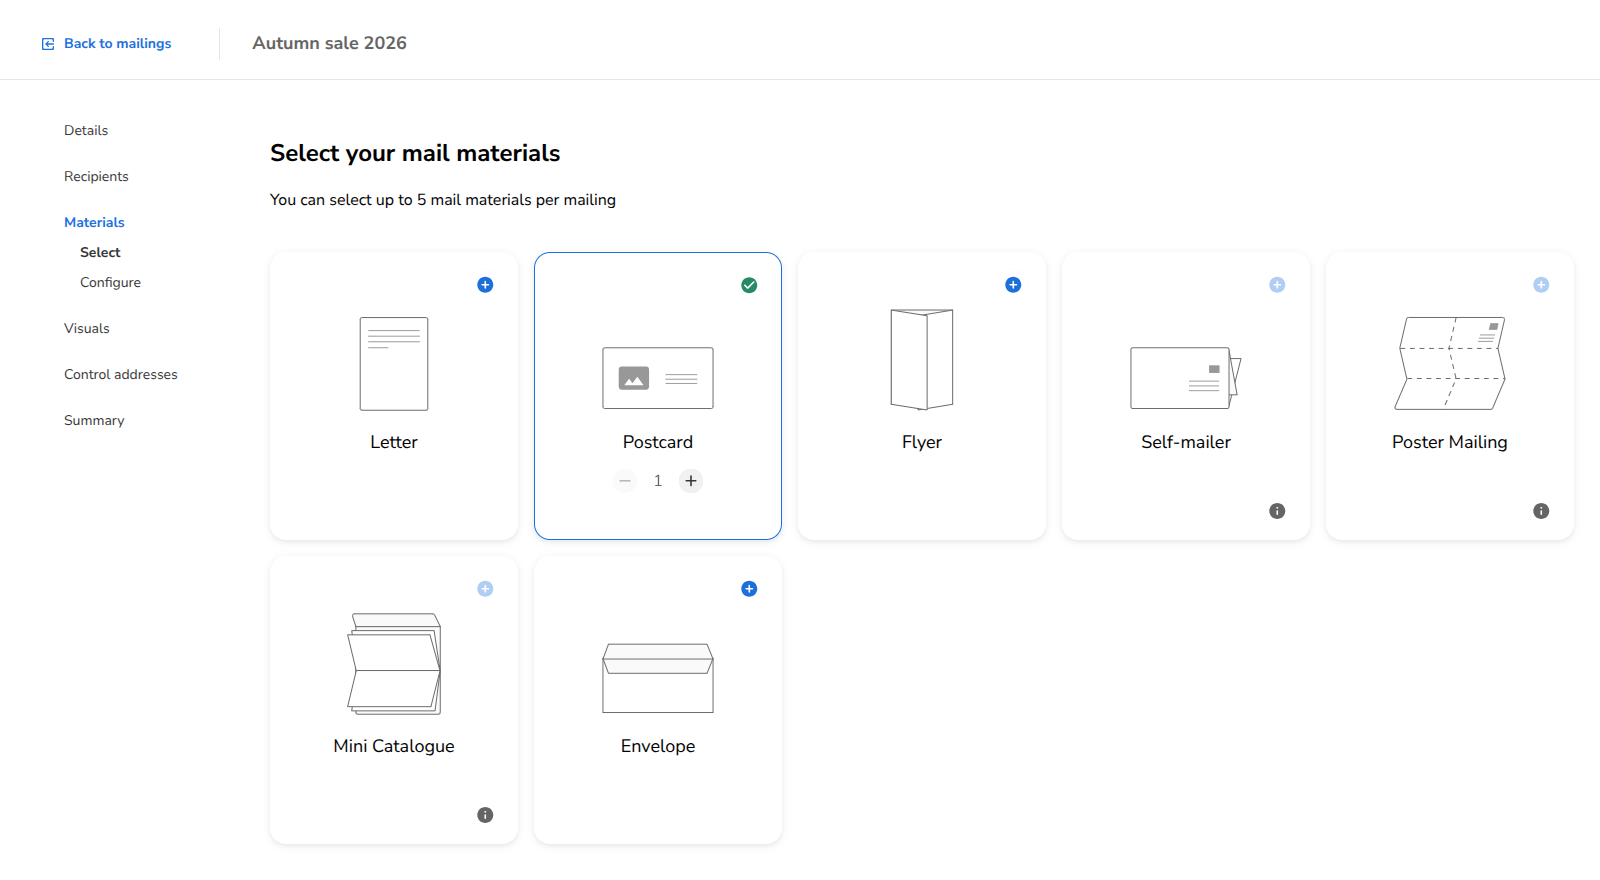
- On Select your mail materials, click a material to add it, for example a letter or a postcard.
- Use the − and + buttons to set how many of each material you want.
You can select up to 5 mail materials per mailing. The selection is saved when you go to another step with Next, Back or the sidebar.
Step 6: Configure your materials
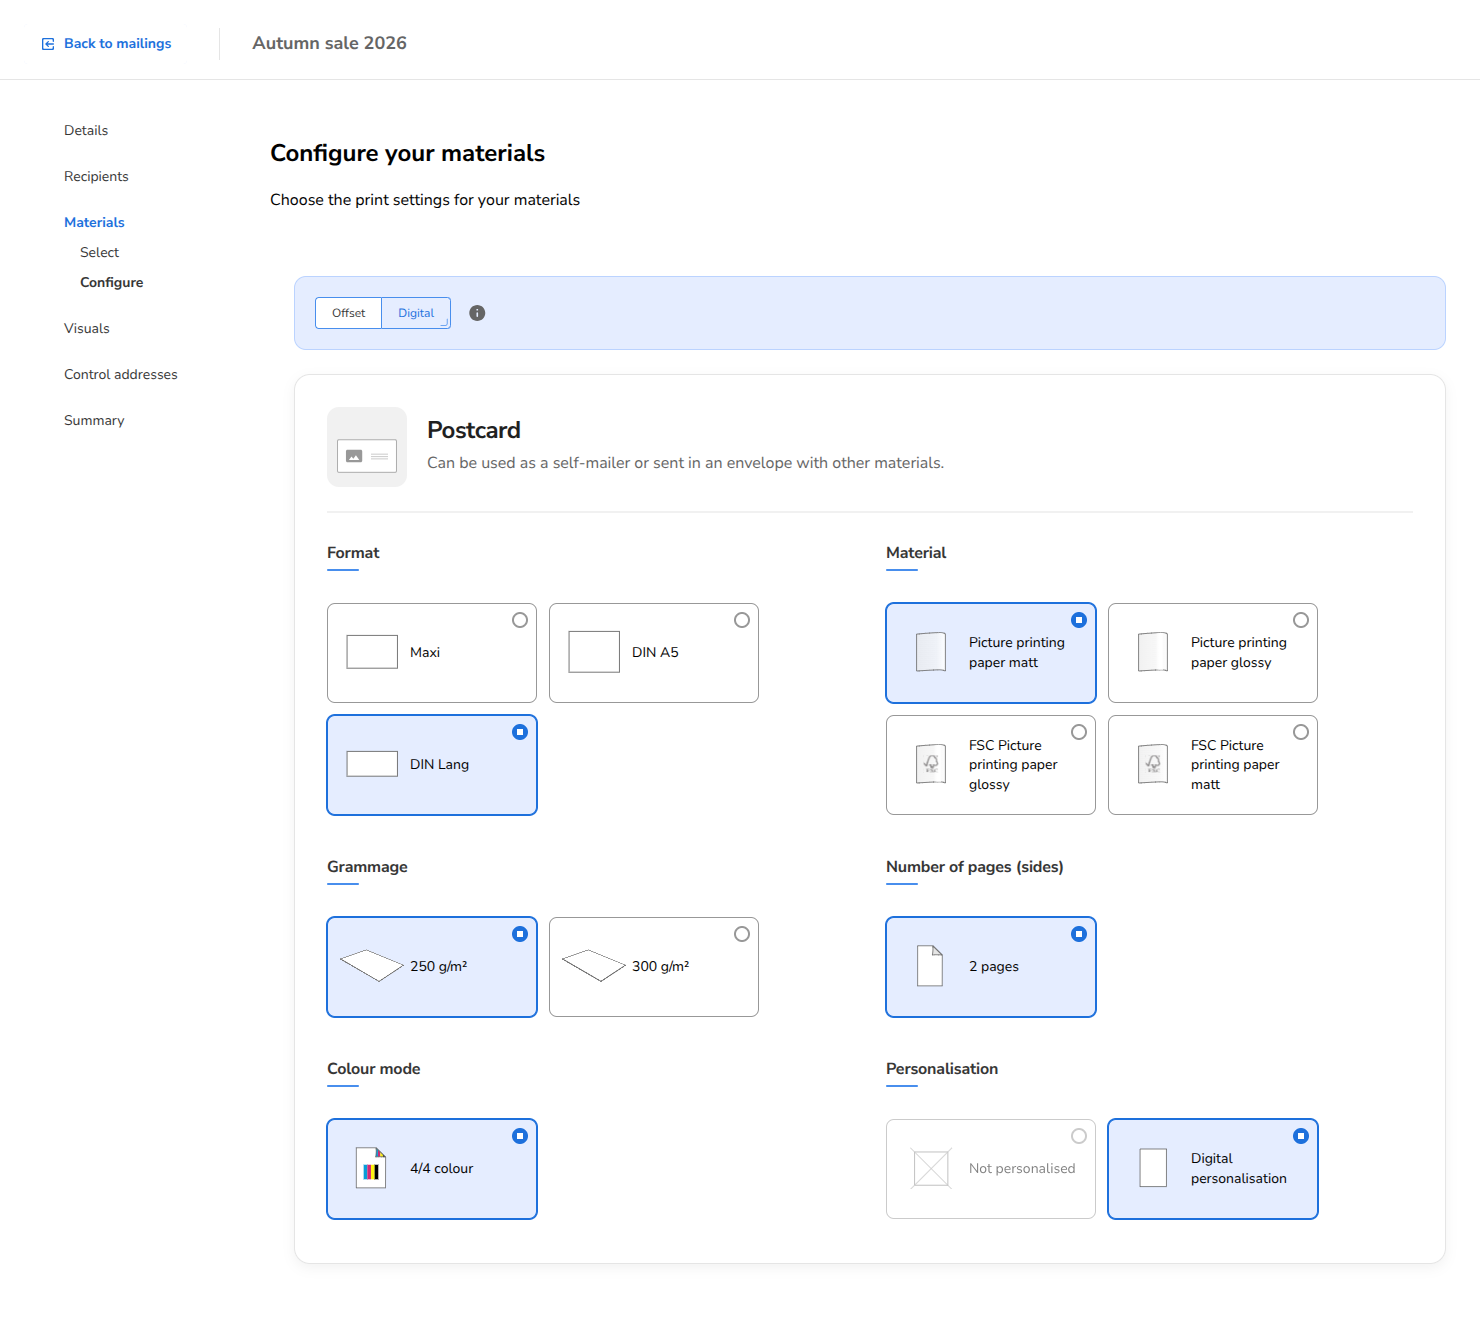
In the step Configure your materials (Materials > Configure in the sidebar), choose the print settings for each material, for example format, paper, colour and personalisation. Each choice is saved at once.
The personalisation setting is important. If a material is personalised, you must upload a personalised example for each variation in the next step.
The pictures in this guide show a postcard in DIN Lang on picture printing paper matt, 250 g/m², 2 pages, 4/4 colour, with digital personalisation.
Step 7: Upload your visuals
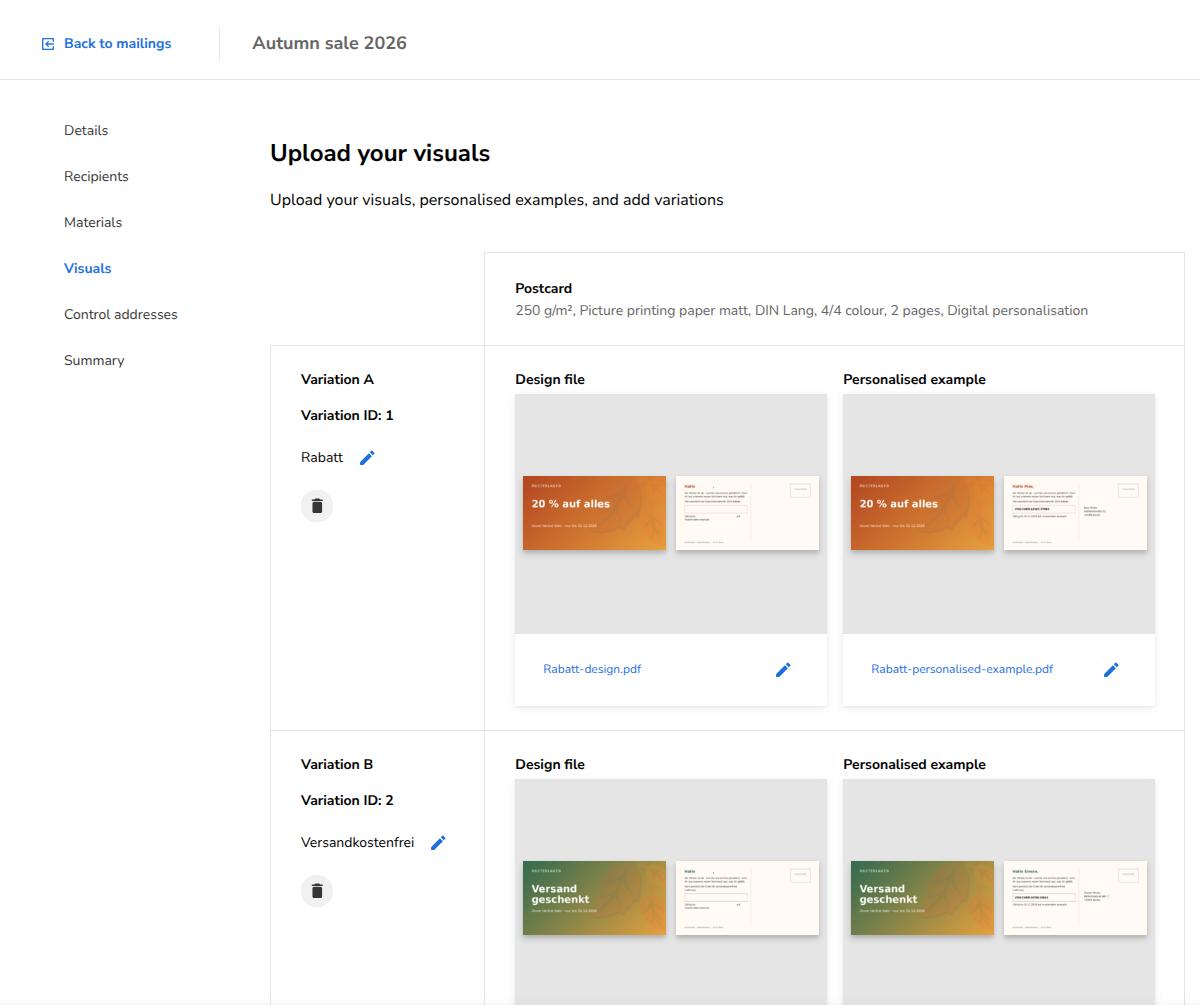
On Upload your visuals, upload one PDF file for each material and each variation.
- Design file: the print file. The file must be a PDF. The maximum size is 200 MB.
- Personalised example: this box shows only for a material that is personalised. Upload one example for each variation.
- Add variation: this button is below the variations. It adds a new design version (Variation B, C, …).
- To give a variation a name, click add name. To change a name, click the pencil icon.
- If your account uses the optilyz API, each variation also shows its number, for example Variation ID: 1 and Variation ID: 2.
- Single design / Different designs: when you have more than one material, choose which materials get a different design for each variation.
For more help with your print files, read Design guidelines. To name your variations, read Add names to variations.
Step 8: Choose your control addresses
Control addresses get a copy of your mailing, so you see what your recipients get.
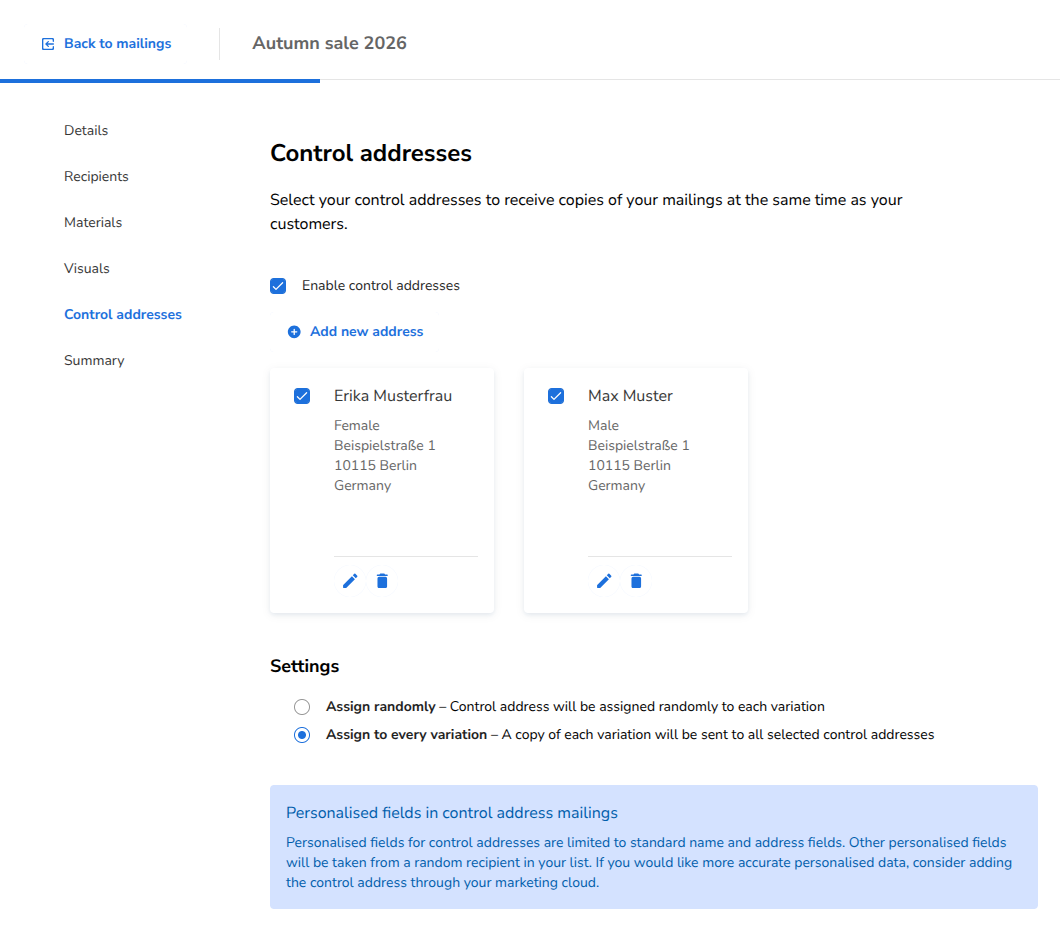
- Keep Enable control addresses selected.
- Select the addresses that must get a copy. All control addresses of your account for this country are selected by default.
- Choose how the copies are assigned:
- Assign randomly (default): each control address gets one variation, chosen at random.
- Assign to every variation: each control address gets a copy of each variation.
The info box Personalised fields in control address mailings tells you which data a control-address copy shows. Only the name and address fields are from the control address. All other personalised fields are from a random recipient in your list.
The example in the picture uses Assign to every variation.
To add an address, click Add new address. Note: when you edit or delete an address here, the change applies to your whole account, not only to this One-Shot. For more information, read Control addresses.
Step 9: Check the summary and start collecting recipients
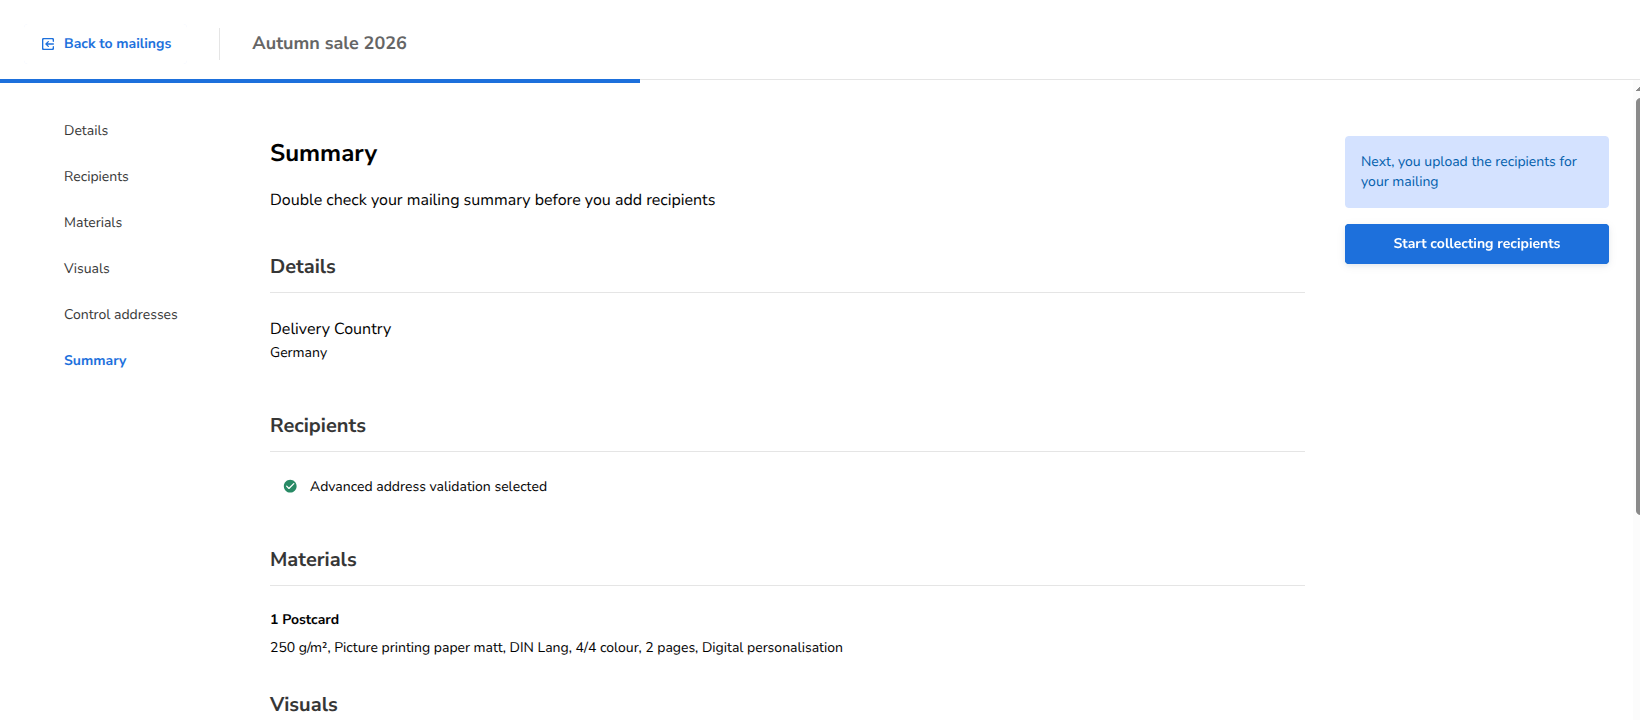
- On Summary, check the country, the validation setting, the materials, the visuals and the control addresses. The visuals and the control addresses are further down. Scroll down to check them.
- Click Start collecting recipients in the right column. Above the button, the info box shows Next, you upload the recipients for your mailing.
This is not the booking. Nothing is printed and nothing is charged yet. Your One-Shot now accepts recipients, and the One-Shot page opens.
Start collecting recipients stays disabled until you select at least one material and upload all design files and personalised examples. The button does not show a reason. If a file is missing, the Visuals section shows Please upload visuals for all personalised examples and variations.
Part B: Collect recipients and book
Step 10: Open the One-Shot page
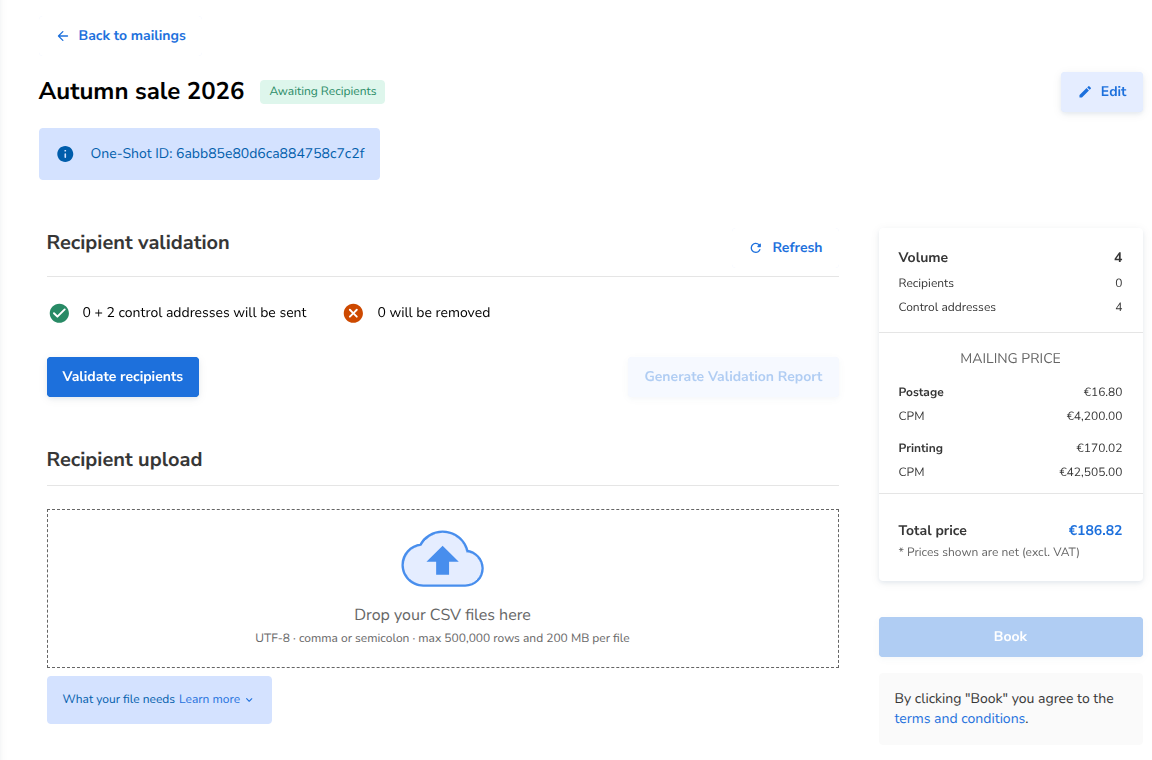
After Start collecting recipients, the One-Shot page opens. The status badge next to the name shows Awaiting Recipients. Your One-Shot now accepts recipients.
The page shows:
- the Edit button at the top right of the page,
- the One-Shot ID under the name,
- the Recipient validation section and the Recipient upload section,
- the price card and the Book button in the right column. Book stays disabled until you validate recipients.
If you selected control addresses, the price card already shows a price. This price is for the control-address copies only. For more information, read step 17.
To come back later, open the Mailings page and click the name of the One-Shot.
Step 11: Find the One-Shot ID
The blue box under the name shows One-Shot ID: and a code of letters and numbers. You need this ID only to send recipients by API. For more information, read Send recipients to a One-Shot by API.
Emarsys and Salesforce Marketing Cloud do not use this ID. There, you select the One-Shot by its name.

Step 12: Set the data mapping first (marketing integration only)
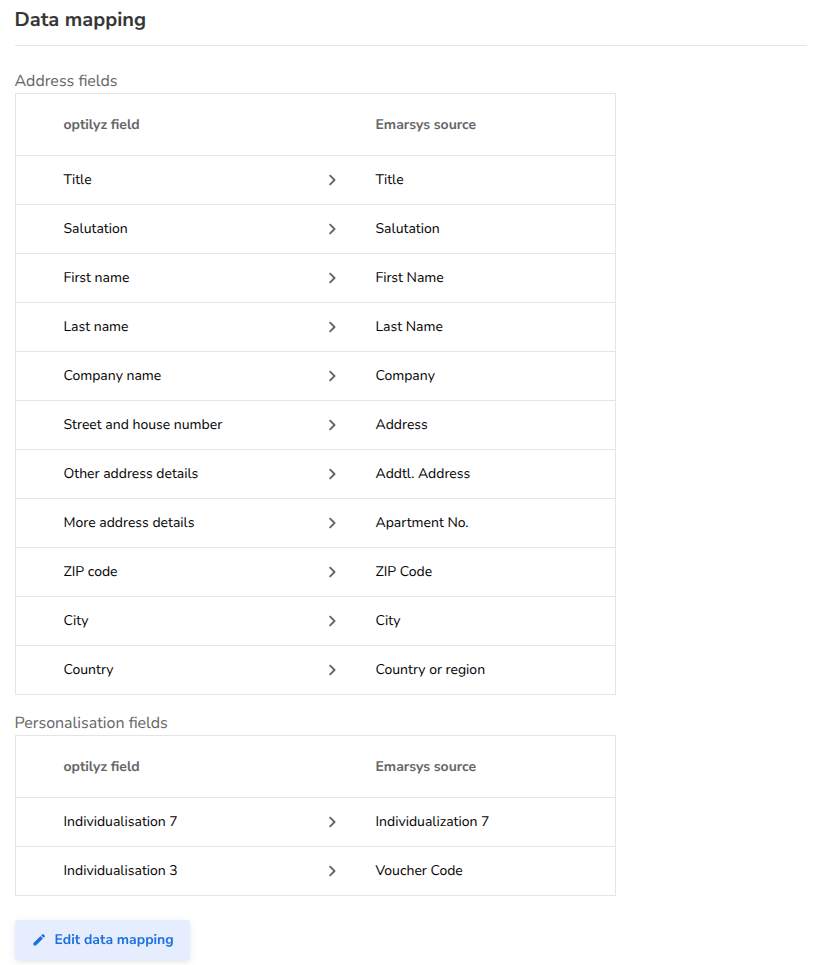
You see the Data mapping section only if your account is connected to Emarsys or Salesforce Marketing Cloud. The data mapping tells optilyz which field in your marketing integration fills which address field and which personalisation field.
- Click Configure data mapping.
- Choose a field for each address field and each personalisation field. Each choice is saved at once.
- Click Done to close the panel.
If your account has a default data mapping, a new One-Shot starts with it. The section then shows the data mapping at once, and the button reads Edit data mapping. Check every field.
For Salesforce Marketing Cloud, select a data extension first. The data mapping is not complete without it.
Do this before you add any recipients. The data mapping locks as soon as the first recipient arrives from any source: API, CSV or marketing integration. After that, you can change it only with Edit, and that deletes all recipients. For more information, read Send recipients from Emarsys or Salesforce Marketing Cloud.
Step 13: Add recipients
You can collect recipients from one source or from several sources. New recipients show in the line … awaiting validation until you validate them.
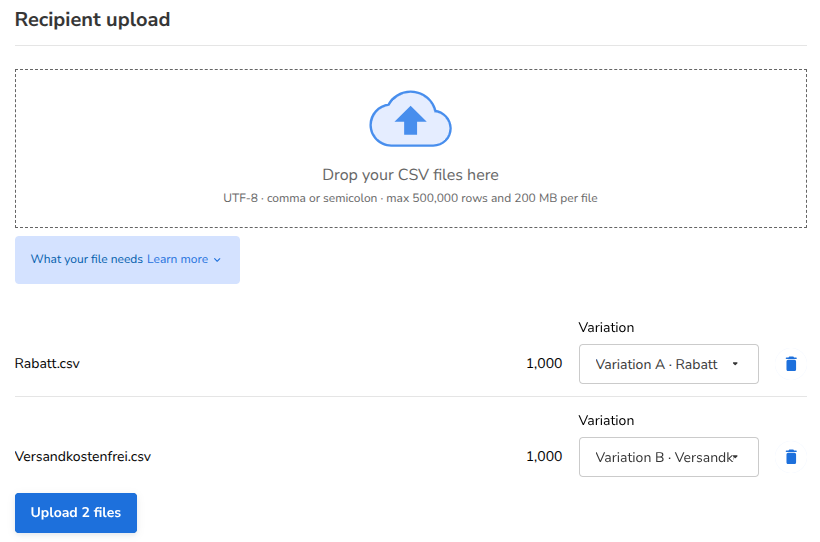
- CSV files: In Recipient upload, drop one or more CSV files. If your One-Shot has more than one variation, choose a Variation for each file. Then click the upload button, for example Upload 2 files. For the file rules, read Upload recipients from CSV files.
- API: Send the recipients to the One-Shot ID from step 11. For more information, read Send recipients to a One-Shot by API.
- Emarsys or Salesforce Marketing Cloud: Send the contacts from your marketing integration to this One-Shot. Select the One-Shot by its name. For more information, read Send recipients from Emarsys or Salesforce Marketing Cloud.
Send recipients only while the status is Awaiting Recipients.
About the CSV upload:
- If the file name is the same as a variation name, we select this variation for you. For example, the file Rabatt.csv goes to Variation A · Rabatt. A file with the name Variation A.csv also goes to Variation A. Check the variation for each file before you click the upload button.
- While the files upload, the page shows Keep this tab open until your files finish uploading.
- When the upload is complete, the page shows a message, for example "2,000 recipients processed. They will be ready for validation shortly."
- The recipients can take some time to show in the line … awaiting validation. To read the numbers again, click Refresh. After a click, the button shows Retry in and a countdown for a few seconds.
Step 14: Validate your recipients
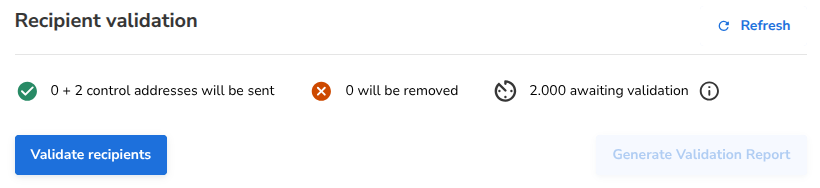
When all recipients are in, click Validate recipients. The validation checks all recipients that wait, from all sources. While it runs, the section shows Validating recipients....
After the validation, the section shows up to three numbers:
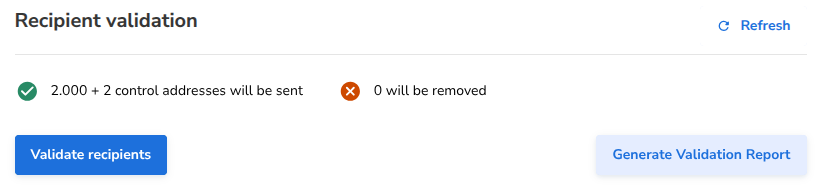
- … will be sent: the recipients that we can deliver to. If control addresses are enabled, the line also shows them: … + 2 control addresses will be sent means two control addresses on top of your recipients.
- … will be removed: the recipients that failed the validation.
- … awaiting validation: the recipients that arrived after the last validation. Click Validate recipients again to check them.
The numbers are totals for all sources together. To read the numbers again, click Refresh.
You cannot start a validation while a CSV upload is running. If recipients from your marketing integration wait and there is no data mapping, the validation does not start. A notice then tells you why.
Step 15: Download the validation report
The validation report is a CSV file with one row for each validated recipient.
- Click Generate Validation Report. The button works only when at least one recipient is validated, no recipient waits for a validation and no validation is running. Before that, the button tooltip says You cannot generate a validation report until you have validated recipients.
- While we prepare the report, the section shows Preparing your report….
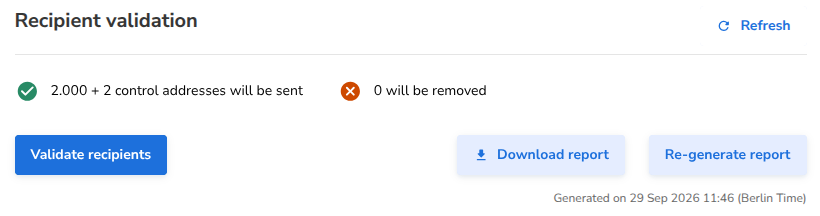
- When the report is ready, click Download report. Under the button, the section shows when the report was made: Generated on … (Berlin Time).
The report contains the address fields, the personalisation values and these columns: VALIDATION CATEGORY, VALIDATION DETAILS, Variation, Variation Name and Source. The column names are in English. If new recipients arrive after you generate the report, validate them first. Then click Re-generate report.
Step 16: Choose the postal handover date
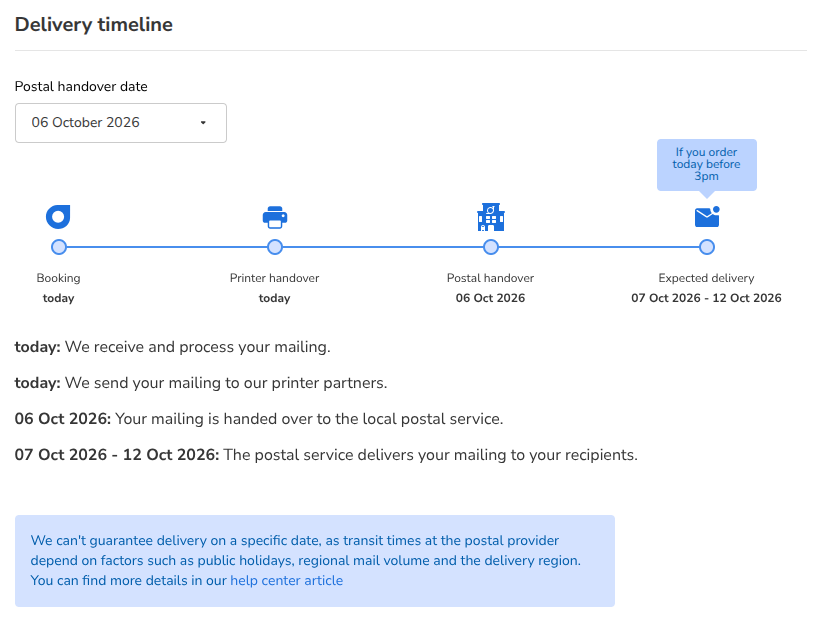
In Delivery timeline, choose the Postal handover date. This is the date on which your mailing goes to the postal service.
- You can choose a date when at least one recipient will be sent and no validation is running. Before that, the section shows You can choose a postal handover date once you have validated recipients.
- Click the Postal handover date field to open the calendar. The calendar starts at the earliest possible date. In the example, today is 29 September, so the first date is 2 October. If you do not choose a date, we use the earliest date.
- In the example, we choose 6 October.
- Your choice is saved at once.
- If a logistics partner is necessary for your country, the label is Earliest postal handover date.
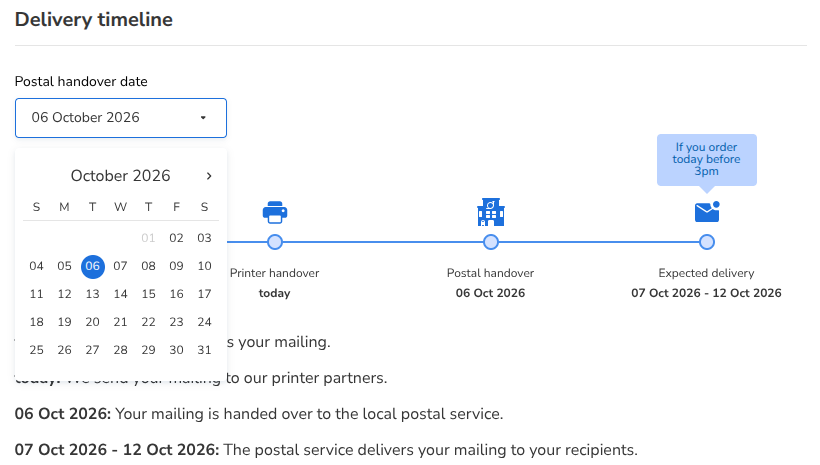
The timeline shows Booking, Printer handover, Postal handover and Expected delivery. When a logistics partner is necessary, it also shows Logistics handover. If the printer handover is today, the timeline shows If you order today before 3pm. The dates then apply only if you book before 3 pm, Berlin time. The expected delivery is a date range. It is an estimate, not a guaranteed date. The page says: "We can't guarantee delivery on a specific date, as transit times at the postal provider depend on factors such as public holidays, regional mail volume and the delivery region."
Step 17: Check the price
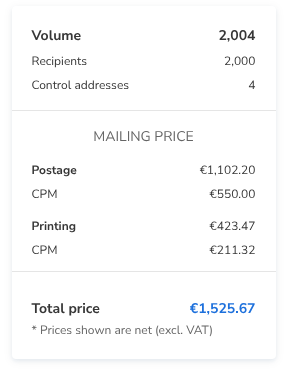
The price card shows Volume, Recipients, Control addresses and the Mailing price: Postage and Printing, each with its CPM (the price for 1,000 copies), and the Total price. The price is for the recipients that will be sent, plus your control-address copies. All prices are net, without VAT.
The price card counts copies, not addresses:
- Control addresses is the number of copies for your control addresses. With Assign to every variation, each control address gets one copy for each variation. For example, 2 control addresses and 2 variations give 4 copies. The validation line counts addresses, so it shows "+ 2 control addresses will be sent".
- Recipients is the number of validated recipients that will be sent. It grows each time you validate new recipients, and the price grows with it.
With very few copies, the price for 1,000 copies (CPM) is very high. It falls as the number of recipients grows. For example, with only the 4 control-address copies, the postage CPM is €4,200.00. With 2,004 copies, it is €550.00.
Right after Start collecting recipients, the card already shows a price for your control-address copies. If there is nothing to price yet, the card shows You can see the price once you have validated recipients.
For some countries or products, optilyz cannot calculate a price automatically. The card then shows "To get an estimate for the current configuration, please get in touch with us at mailings@optilyz.com", and the button reads Request a price.
Step 18: Book
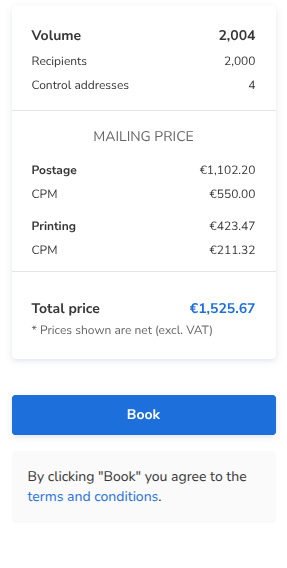
Book is enabled when all conditions in the table below are true. The booking uses the postal handover date from step 16. Click Book. Under the button, the page shows: "By clicking "Book" you agree to the terms and conditions."
If the button reads Request a price, a click books your One-Shot as a price request. The terms notice does not show in this case.
Book stays disabled until all conditions are true. Move the pointer over the button to see the reason:
| Reason | Message |
|---|---|
| A validation is running. | You can book once the recipient validation has finished. |
| Some recipients are not validated. | You can book once every recipient has been validated. |
| No recipient can be sent to. | You can book once you have at least one recipient we can send to. |
| The One-Shot has no materials. | We cannot work out delivery dates because this One-Shot has no materials. Reach out to support@optilyz.com. |
| The postal handover date is no longer possible. | The postal handover date you chose is no longer possible. Please choose a new date. |
While the page loads, Book is disabled without a message. If the page cannot read the booking status or the number of recipients, a notice asks you to refresh your browser.
Step 19: After booking
After you click Book, the page shows We are preparing your mailing and "We are processing your mailing. This takes a moment, and we will take you there as soon as it is ready." You can stay on the page or click Back to mailings.
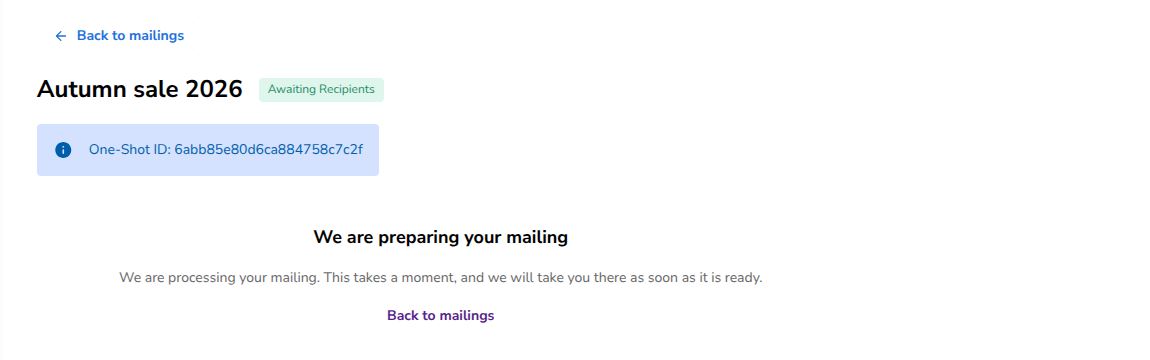
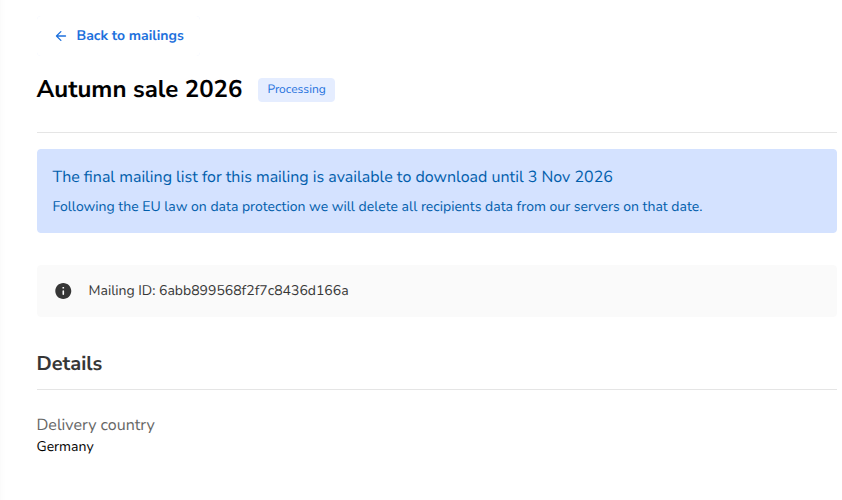
When the mailing is ready, the normal mailing page opens. The status is Processing. The page shows a Mailing ID: and the message "The final mailing list for this mailing is available to download until" and a date. On that date, we delete all recipient data from our servers, because of the EU data-protection law. On the Mailings page, the One-Shot now shows as a mailing.
After booking, you cannot change the One-Shot. It also does not accept new recipients.
Change your One-Shot
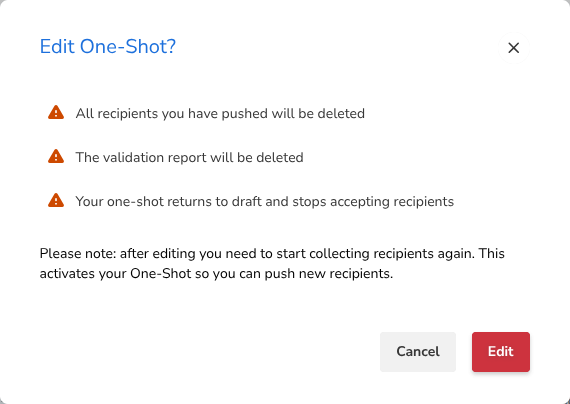
Before you book, you can change the setup of your One-Shot.
- On the One-Shot page, click Edit.
- Read the warnings in the Edit One-Shot?window:
- All recipients you have pushed will be deleted
- The validation report will be deleted
- Your one-shot returns to draft and stops accepting recipients
- Click Edit to confirm.
The setup steps open again. Make your changes, then click Start collecting recipients on the Summary step. After that, add all recipients again, from every source, and validate them.
Edit does not delete the postal handover date that you chose. If this date is no longer possible when you book again, choose a new date.
Edit is disabled while a validation is running, while a validation report is being generated and while a CSV upload is running. You cannot change the delivery country, also not with Edit.
Good to know
- Start collecting recipients is not Book. The first button only opens your One-Shot for recipients. You book the mailing with Book on the One-Shot page.
- Stop sending, then validate, then book. Each new recipient after a validation waits for a new validation. Book stays disabled until you validate again.
- Recipients sent at the wrong time are lost. A One-Shot accepts recipients only while its status is Awaiting Recipients. Recipients that you send before Start collecting recipients, after Edit or after booking are not added. The API does not always show an error for this.
- Edit deletes all recipients from all sources, and the validation report.
- The delivery country is fixed after you create the One-Shot.
- Set the data mapping first if you use Emarsys or Salesforce Marketing Cloud. It locks when the first recipient arrives.
- Validation happens only when you click Validate recipients. There is no automatic validation for a One-Shot.
- Design files on the One-Shot page: before you book, you can replace a design file or a personalised example, and rename a variation, in the Visuals section of the One-Shot page. You cannot add or delete variations there.
- Vouchers: if your account is connected to Emarsys, the Upload your visuals step shows Add vouchers. There, you enter an Emarsys ESL code for a variation.
FAQ
Where did "New Mailing" go? The New One-Shot button replaces New Mailing. A One-Shot does everything the old one-time mailing did, and it also accepts recipients from the API and from marketing integrations.
What is the difference to an automation? An automation runs all the time and creates mailings on a schedule. A One-Shot sends once. After booking, it becomes a normal mailing.
Can I combine sources? Yes. The API, your marketing integration and CSV files can all send recipients to the same One-Shot. The numbers on the One-Shot page are totals for all sources. The validation report shows the source of each recipient.
How do I send recipients by API? Click Start collecting recipients first. Then send the recipients to the One-Shot ID on the One-Shot page. Read Send recipients to a One-Shot by API.
Can I change the One-Shot after I start collecting recipients? Yes, with Edit. This deletes all recipients and the validation report, and the One-Shot goes back to draft. After booking, you cannot change the One-Shot.
Why can I not book yet? Move the pointer over Book. The message tells you which condition is missing. See step 18.
When will my mailing arrive? The delivery timeline shows the expected delivery. It is an estimate. Transit times depend on public holidays, regional mail volume and the delivery region.
Do I get a copy? Yes, if you select control addresses. With Assign randomly, each control address gets one variation. With Assign to every variation, each control address gets a copy of each variation.